Getting started
Contributing
User Guide

Configuration Management
First time installing? Follow the Docker Compose installation guide to get Twenty running, then return here for configuration.
Twenty offers two configuration modes to suit different deployment needs:
Admin panel access: Only users with admin privileges (canAccessFullAdminPanel: true) can access the configuration interface.
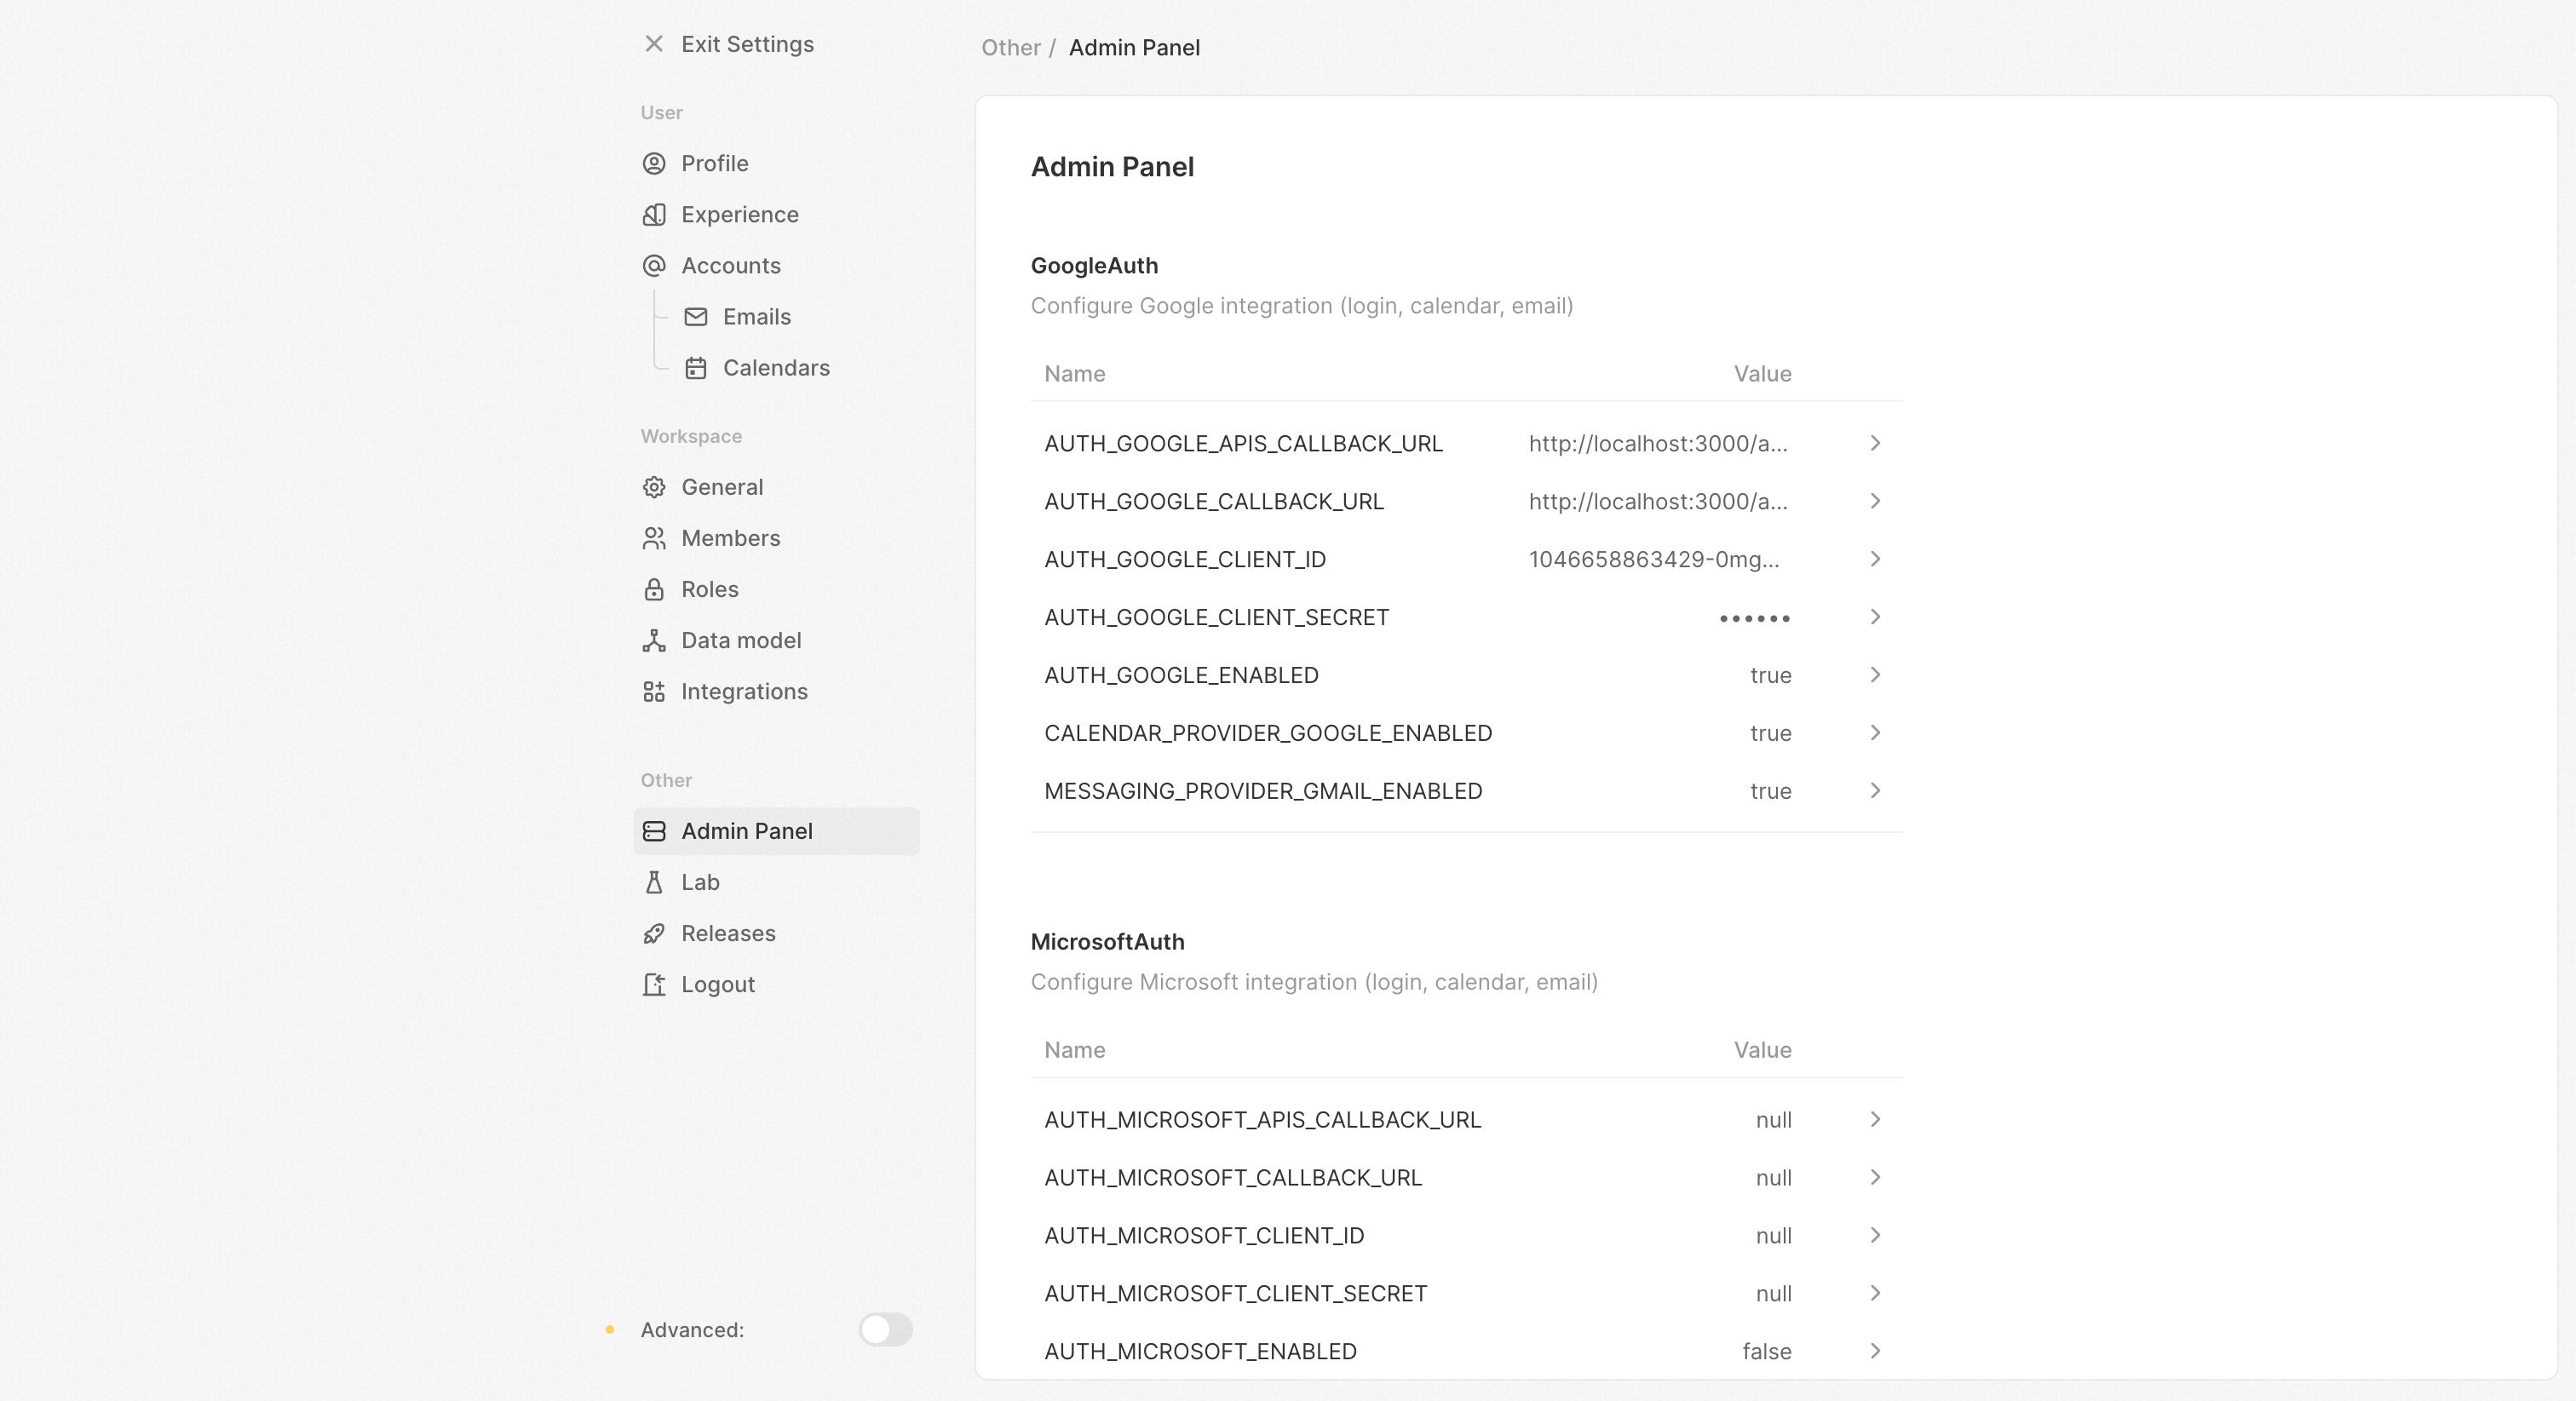
1. Admin Panel Configuration (Default)
IS_CONFIG_VARIABLES_IN_DB_ENABLED=true # default
Most configuration happens through the UI after installation:
- Access your Twenty instance (usually
http://localhost:3000) - Go to Settings / Admin Panel / Configuration Variables
- Configure integrations, email, storage, and more
- Changes take effect immediately (within 15 seconds for multi-container deployments)
Multi-Container Deployments: When using database configuration (IS_CONFIG_VARIABLES_IN_DB_ENABLED=true), both server and worker containers read from the same database. Admin panel changes affect both automatically, eliminating the need to duplicate environment variables between containers (except for infrastructure variables).
What you can configure through the admin panel:
- Authentication - Google/Microsoft OAuth, password settings
- Email - SMTP settings, templates, verification
- Storage - S3 configuration, local storage paths
- Integrations - Gmail, Google Calendar, Microsoft services
- Workflow & Rate Limiting - Execution limits, API throttling
- And much more...
Each variable is documented with descriptions in your admin panel at Settings → Admin Panel → Configuration Variables.
Some infrastructure settings like database connections (PG_DATABASE_URL), server URLs (SERVER_URL), and app secrets (APP_SECRET) can only be configured via .env file.
2. Environment-Only Configuration
IS_CONFIG_VARIABLES_IN_DB_ENABLED=false
All configuration managed through .env files:
- Set
IS_CONFIG_VARIABLES_IN_DB_ENABLED=falsein your.envfile - Add all configuration variables to your
.envfile - Restart containers for changes to take effect
- Admin panel will show current values but cannot modify them
Gmail & Google Calendar Integration
Create Google Cloud Project
- Go to Google Cloud Console
- Create a new project or select existing one
- Enable these APIs:
Configure OAuth
- Go to Credentials
- Create OAuth 2.0 Client ID
- Add these redirect URIs:
https://<your-domain>/auth/google/redirect(for SSO)https://<your-domain>/auth/google-apis/get-access-token(for integrations)
Configure in Twenty
- Go to Settings → Admin Panel → Configuration Variables
- Find the Google Auth section
- Set these variables:
MESSAGING_PROVIDER_GMAIL_ENABLED=trueCALENDAR_PROVIDER_GOOGLE_ENABLED=trueAUTH_GOOGLE_CLIENT_ID=<client-id>AUTH_GOOGLE_CLIENT_SECRET=<client-secret>AUTH_GOOGLE_CALLBACK_URL=https://<your-domain>/auth/google/redirectAUTH_GOOGLE_APIS_CALLBACK_URL=https://<your-domain>/auth/google-apis/get-access-token
Environment-only mode: If you set IS_CONFIG_VARIABLES_IN_DB_ENABLED=false, add these variables to your .env file instead.
Required scopes (automatically configured): See relevant source code
https://www.googleapis.com/auth/calendar.eventshttps://www.googleapis.com/auth/gmail.readonlyhttps://www.googleapis.com/auth/profile.emails.read
If your app is in test mode
If your app is in test mode, you will need to add test users to your project.
Under OAuth consent screen, add your test users to the "Test users" section.
Microsoft 365 Integration
Users must have a Microsoft 365 Licence to be able to use the Calendar and Messaging API. They will not be able to sync their account on Twenty without one.
Create a project in Microsoft Azure
You will need to create a project in Microsoft Azure and get the credentials.
Enable APIs
On Microsoft Azure Console enable the following APIs in "Permissions":
- Microsoft Graph: Mail.ReadWrite
- Microsoft Graph: Mail.Send
- Microsoft Graph: Calendars.Read
- Microsoft Graph: User.Read
- Microsoft Graph: openid
- Microsoft Graph: email
- Microsoft Graph: profile
- Microsoft Graph: offline_access
Note: "Mail.ReadWrite" and "Mail.Send" are only mandatory if you want to send emails using our workflow actions. You can use "Mail.Read" instead if you only want to receive emails.
Authorized redirect URIs
You need to add the following redirect URIs to your project:
https://<your-domain>/auth/microsoft/redirectif you want to use Microsoft SSOhttps://<your-domain>/auth/microsoft-apis/get-access-token
Configure in Twenty
- Go to Settings → Admin Panel → Configuration Variables
- Find the Microsoft Auth section
- Set these variables:
MESSAGING_PROVIDER_MICROSOFT_ENABLED=trueCALENDAR_PROVIDER_MICROSOFT_ENABLED=trueAUTH_MICROSOFT_ENABLED=trueAUTH_MICROSOFT_CLIENT_ID=<client-id>AUTH_MICROSOFT_CLIENT_SECRET=<client-secret>AUTH_MICROSOFT_CALLBACK_URL=https://<your-domain>/auth/microsoft/redirectAUTH_MICROSOFT_APIS_CALLBACK_URL=https://<your-domain>/auth/microsoft-apis/get-access-token
Environment-only mode: If you set IS_CONFIG_VARIABLES_IN_DB_ENABLED=false, add these variables to your .env file instead.
Configure scopes
- 'openid'
- 'email'
- 'profile'
- 'offline_access'
- 'Mail.ReadWrite'
- 'Mail.Send'
- 'Calendars.Read'
If your app is in test mode
If your app is in test mode, you will need to add test users to your project.
Add your test users to the "Users and groups" section.
Background Jobs for Calendar & Messaging
After configuring Gmail, Google Calendar, or Microsoft 365 integrations, you need to start the background jobs that sync data.
Register the following recurring jobs in your worker container:
# from your worker container
yarn command:prod cron:messaging:messages-import
yarn command:prod cron:messaging:message-list-fetch
yarn command:prod cron:calendar:calendar-event-list-fetch
yarn command:prod cron:calendar:calendar-events-import
yarn command:prod cron:messaging:ongoing-stale
yarn command:prod cron:calendar:ongoing-stale
yarn command:prod cron:workflow:automated-cron-trigger
Email Configuration
- Go to Settings → Admin Panel → Configuration Variables
- Find the Email section
- Configure your SMTP settings:
You will need to provision an App Password.
- EMAIL_DRIVER=smtp
- EMAIL_SMTP_HOST=smtp.gmail.com
- EMAIL_SMTP_PORT=465
- EMAIL_SMTP_USER=gmail_email_address
- EMAIL_SMTP_PASSWORD='gmail_app_password'
Environment-only mode: If you set IS_CONFIG_VARIABLES_IN_DB_ENABLED=false, add these variables to your .env file instead.